Have you ever seen your houseplant looking sad even though you water it often? I have learned the hard way that too much water can hurt plants. Overwatering is one of the biggest mistakes plant lovers make. The leaves turn yellow, the soil stays wet for too long, and the roots start to rot.
I once drowned my favorite fern without realizing it! But don’t worry—I’ll show you how to fix an overwatered houseplant and bring it back to life. With a few simple steps, you can save your plant and keep it healthy. Let’s learn how to spot the signs, dry out the soil, and prevent this mistake in the future!
How to Fix an Overwatered Houseplant
Signs of Overwatering Plants
I have learned the hard way that too much water kills plants. I used to think watering daily kept them healthy. But one day, I noticed my plants looking weak and sad. Their leaves turned yellow, and some even fell off. At first, I thought they needed more water, so I poured more. That made things worse.
The soil stayed wet for too long and smelled bad. When I touched the dirt, it felt soggy instead of damp. I saw tiny mushrooms growing near the roots. That was strange and new to me. My plants’ leaves became soft and mushy instead of firm. Some leaves had brown spots that spread fast. I realized something was very wrong.
One day, I pulled a plant from its pot to check. The roots were dark, slimy, and smelled awful. I knew they were rotting from too much water. Healthy roots should be white and firm. I felt awful for drowning my plants without knowing it.
Some plants also started to droop as if thirsty. I got confused because the soil was still wet. That’s when I learned that too much water stops roots from breathing. Without air, roots die, and plants act like they have no water. It was a big lesson for me.
I also saw mold on top of the soil. It looked white and fuzzy, and I knew that wasn’t normal. Bugs like fungus gnats also showed up. These tiny flying insects love wet soil. Their larvae eat roots, making things even worse.
If your plants show signs of overwatering, don’t panic. Stop watering, check the roots, and let the soil dry. Use the right pots and soil, and learn what each plant needs. Your plants will thank you by growing strong and healthy. Trust me, I’ve been there, and I won’t make the same mistake again.
The Ultimate Guide to Fixing an Overwatered Houseplant
I love houseplants, but I made a big mistake once. I overwatered one of my favorite plants. The leaves turned yellow, and the soil smelled bad. I panicked and thought I had killed it. But I didn’t give up. I researched, tried different things, and saved my plant. Here’s how I did it, step by step.
1. Recognizing the Signs of Overwatering
The first step was to find out if my plant was really overwatered. At first, I thought the yellow leaves meant it needed more water. But when I touched the soil, it felt too wet. The plant looked weak, and some leaves fell off. There was also a bad smell coming from the soil. This was a sign of root rot. I knew I had to act fast.
I also checked the roots. I carefully removed the plant from the pot. The roots looked brown and mushy instead of white and firm. This confirmed that my plant was overwatered. If I had waited longer, the roots would have rotted completely. I learned that too much water is just as bad as too little.
2. Stopping Watering Immediately
As soon as I knew my plant was overwatered, I stopped watering. Adding more water would have made things worse. The roots needed time to dry out and heal. I left the plant in a dry, bright spot but away from direct sunlight. Sunlight could stress the weak plant even more.
I also made sure the air was moving around the plant. I turned on a small fan nearby to help the soil dry faster. This step was very important. If the soil stays wet too long, the roots will rot even more. I had to be patient and wait until the soil dried before doing anything else.
3. Removing the Plant from the Pot
I decided to take the plant out of the pot to check its roots. I gently tipped the pot and slid the plant out. I was careful not to break the stems or leaves. The soil was soggy, and I could see dark, mushy roots. This meant root rot had started.
I shook off as much wet soil as possible. Then, I used my fingers to loosen the remaining soil. I didn’t pull too hard because the roots were delicate. This step helped the plant breathe. It also let me see how bad the root rot was. I knew the next step would be cutting off the damaged roots.
4. Cutting Off Rotted Roots
I grabbed a clean pair of scissors and wiped them with alcohol. This was to make sure I didn’t spread any bacteria. I carefully cut away all the brown, mushy roots. I only left the firm, white roots. Some parts of the root system were completely gone. It made me sad, but I had to do it to save the plant.
After cutting, I let the roots dry for a few hours. This helped prevent further rot. I learned that trimming sick roots is necessary. It stops the rot from spreading. It also gives the plant a chance to grow new, healthy roots.
5. Treating the Roots with Fungicide
To make sure the plant didn’t get sick again, I treated the roots. I used a fungicide to kill any remaining bacteria or fungus. I mixed the fungicide with water and dipped the roots in it. Then, I let the plant sit for an hour before repotting.
This step is important because root rot spreads easily. If I had skipped it, the problem might have come back. Some people use cinnamon as a natural fungicide. I tried both methods on different plants, and both worked well.
6. Choosing the Right Soil and Pot
I picked a new pot with drainage holes. A pot without drainage would trap water again. I also chose fresh, well-draining soil. This kind of soil lets extra water flow out instead of staying around the roots.
I filled the pot halfway with the new soil. Then, I placed the plant inside and added more soil around it. I pressed the soil gently to hold the plant in place. But I didn’t pack it too tight. The roots needed space to breathe and grow.
7. Repotting the Plant Carefully
Once I had the right soil and pot, I repotted my plant. I placed it in the center and added soil around it. I made sure not to bury the stem too deep. The roots needed to be covered but not smothered.
After repotting, I didn’t water the plant right away. The roots needed time to adjust. I waited at least a week before giving it a small amount of water. This helped prevent more overwatering.
8. Adjusting the Watering Schedule
I realized I had been watering too often. I needed a better watering schedule. I started checking the soil before watering. If the top inch was dry, I watered. If it was still wet, I waited.
I also used a simple trick. I stuck my finger into the soil. If it felt damp, I held off on watering. This small change made a big difference. My plant started looking healthier.
9. Improving Drainage
To avoid overwatering again, I improved drainage. I placed small rocks at the bottom of the pot. This helped water flow out better. I also made sure the pot had holes for excess water to escape.
I also stopped using a saucer that held water. Before, I used to let water sit in the saucer under the pot. But that kept the roots wet too long. Now, I empty the saucer after watering.
10. Watching for Signs of Recovery
After following all these steps, I watched my plant closely. I checked for new growth and healthier leaves. At first, some leaves still looked bad. But after a few weeks, I saw small green shoots. That was a good sign!
I kept taking care of it and avoided overwatering. In time, my plant fully recovered. I felt proud that I saved it. Now, I always check my plants before watering. I never want to make the same mistake again.

How I Learned to Prevent Overwatering in the Future
I used to overwater my plants without knowing it. I thought more water meant healthier plants. But instead of thriving, my plants started to wilt. Their leaves turned yellow, and the soil smelled bad. That’s when I realized I had to change my approach. After trial and error, I learned how to prevent overwatering. Here are the steps I follow now to keep my plants happy.
Understanding the Needs of Each Plant
Every plant is different, and I had to learn that the hard way. Some plants love water, while others prefer dry soil. Before buying any plant, I research its watering needs. If you’re new to plant care, check out my guide on How to Water Indoor Plants: A Beginner’s Guide for essential watering tips.
I check if it’s a drought-tolerant plant or one that loves moisture. I also pay attention to the season. Plants need less water in winter and more in summer. This helps me adjust my watering routine accordingly. Now, I never water all my plants the same way. I check their needs first to avoid mistakes.
I also observed the plant’s natural habitat. Cactus plants thrive in dry deserts, so they need less water. Ferns, on the other hand, grow in damp forests, so they need more. Understanding this made a huge difference in how I water. I no longer assume all plants need the same care. Instead, I treat each plant based on its natural environment. This simple change saved many of my plants from overwatering.
Checking the Soil Before Watering
Before, I watered my plants on a fixed schedule. I thought watering every day was good. But then I noticed my plants were dying. That’s when I learned to check the soil first. Now, I never water without testing the soil’s moisture. If you’re unsure how often to water different plants, my guide on How Often to Water Indoor Plants: Guide by Plant Type can help you find the right balance. I do this by sticking my finger one inch deep into the soil. If it feels dry, I water the plant. If it feels moist, I wait another day. This simple trick stopped me from giving too much water.
Another method I use is a moisture meter. This tool tells me if the soil is wet, dry, or just right. It removes the guesswork and makes watering easier. I also observed the soil color. Dark soil means it still has moisture, while light brown soil means it’s dry. These small details help me make better watering decisions.
By checking the soil before watering, I’ve saved many plants. I no longer drown their roots or keep them too dry. This habit has become a part of my daily plant care routine. Now, my plants look healthier, and I don’t waste water.
Choosing the Right Pot and Soil
I used to plant everything in the same type of pot. I didn’t think the pot or soil mattered. But when my plants started dying, I realized my mistake. Some pots hold too much water, leading to root rot. Others dry out too fast, leaving the plant thirsty. I had to find the right balance.
Now, I only use pots with drainage holes. These holes let extra water escape, preventing water buildup. I also add small stones at the bottom of the pot. This helps improve drainage and keeps the roots healthy. Choosing the right soil is just as important. I no longer use heavy garden soil. Instead, I pick well-draining soil for each plant type. For example, cacti need sandy soil, while ferns need rich, moist soil.
Using the right pot and soil has made a huge difference. My plants no longer suffer from waterlogged roots. They also absorb just the right amount of moisture. This simple change helped me stop overwatering once and for all.
Watering at the Right Time of Day
I used to water my plants at any time of the day. Sometimes, I watered them in the afternoon when the sun was strong. Other times, I watered late at night. I didn’t think it made a difference. But then I noticed some plants were drying out too fast, while others stayed too wet. That’s when I learned about the best time to water.
Now, I always water early in the morning. This allows the plants to absorb moisture before the sun gets too hot. It also gives the soil enough time to dry before nightfall. Watering at night is a mistake I no longer make. The soil stays wet for too long, which can cause root rot. I also avoid watering in the afternoon because the water evaporates too quickly.
By sticking to a morning watering routine, I’ve seen great results. My plants stay hydrated without staying too wet. They absorb what they need, and the rest evaporates naturally. This simple timing adjustment has helped prevent overwatering.
Observing Plant Signals and Adjusting Accordingly
Plants give clear signals when they have too much water. Before, I ignored these signs because I didn’t know what to look for. But after losing a few plants, I started paying attention. Now, I check my plants daily for any changes. If the leaves turn yellow or feel soft, I know I’ve watered too much. If the plant looks weak and droopy, I hold back on watering.
Another sign I watch for is mold or fungus on the soil. This means the soil is staying too wet for too long. When I see this, I improve air circulation around the plant. I also remove any dead leaves to prevent further issues. If the roots smell bad, I know they are rotting. In that case, I take the plant out and trim the damaged roots. Then, I replant it in fresh, dry soil.
By observing plant signals, I’ve learned to adjust my watering habits. I no longer water just because I think I should. Instead, I let the plants tell me what they need. This has saved many of my plants from dying due to overwatering.
Providing Proper Airflow and Sunlight
Good airflow and sunlight help prevent overwatering issues. Before, I kept my plants in dark corners without much airflow. The soil stayed wet for too long, and mold started growing. I didn’t realize that stagnant air could harm my plants. Now, I make sure my plants get enough fresh air and light.
I place them near windows where they can get indirect sunlight. For outdoor plants, I make sure they are not in too much shade. If a plant needs high humidity, I still ensure there’s some air movement. I use a small fan to circulate air around indoor plants. This helps dry the soil faster and prevents fungal growth.
Sunlight is just as important. Plants that don’t get enough light struggle to use water efficiently. They stay wet for too long, leading to root rot. Now, I place each plant where it can get the right amount of light. This small change has helped me prevent overwatering problems.
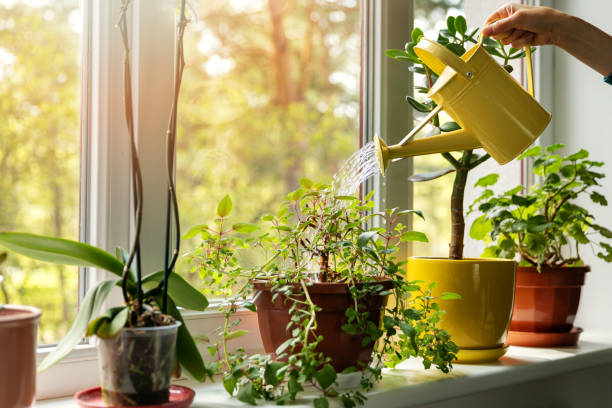
Using the Right Watering Technique
I used to pour water all at once, flooding the soil. I thought this was the best way to hydrate my plants. But then I noticed water pooling on the surface. It wasn’t reaching the roots properly. Some plants got too much water, while others didn’t get enough. That’s when I changed my watering technique.
Now, I water slowly and evenly. I pour water at the base of the plant, not on the leaves. This allows the roots to absorb moisture directly. I also water in small amounts, letting it soak in before adding more. This prevents excess water from sitting in the pot. For plants that need deep watering, I water until I see it draining from the bottom.
I also use a watering can with a narrow spout. This gives me better control over how much water I pour. With these techniques, I avoid drowning my plants. They now get just the right amount of water every time.
Conclusion
Overwatering is a common mistake, but I have learned how to fix it. Now, I pay close attention to my plants and their needs. With the right care, any overwatered plant can recover and grow strong again.
FAQ
How to fix an overwatered houseplant
Remove the plant from the wet soil and let the roots dry. Trim damaged roots and repot it in fresh, well-draining soil.
How to fix overwatered indoor plants
Stop watering and place the plant in a warm, airy spot. Check the roots, remove rot, and repot in dry soil if needed.
How to dry out an overwatered indoor plant
Move the plant to bright, indirect light and improve air circulation. Avoid watering until the topsoil feels completely dry.
How to repair overwatered plants
Trim yellow or mushy leaves and remove rotten roots gently. Use fresh, dry soil and water only when the soil feels dry.
How to fix a plant that has been overwatered
Take the plant out of soggy soil and remove dead roots. Repot with dry soil and ensure proper drainage to prevent future overwatering.
Overwatered houseplant
An overwatered plant may have yellow leaves and mushy stems. Fix it by letting the soil dry and adjusting your watering routine.
How to fix an underwatered plant
Soak the plant in water for 10-15 minutes to rehydrate it. Water regularly and mist leaves if they look dry or crispy.
